Opacity Intensive
Questions on opacity and the making of opacity maps are common, so I thought I’d write up a guide just on the subject of opacity use.
Opacity maps are companion image files that tell the texture what pixels to render and at what level of transparency to render them at. In this guide I will discuss various uses of opacity and touch on the issues that you need to be aware of in each area.
The Basics
There are three main things about opacity you must know.
Color: White is solid, Black is clear, Grey is sheer
Size: Opacity maps must be the exact same size of the texture they go with and both should follow the 2x rules.
Conflicts: Opacity’s that use blending will conflict with one another.
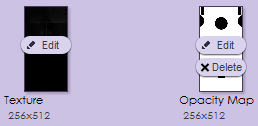
There are two types of opacity on IMVU each has its use and place.
Non Blending Opacity: These are basic on/off black and white opacities. Either the texture is there or it isn’t. These textures will render true with no conflicts. If you dont need your texture to be sheer always double check that the blending setting is turned off or else your texture will suffer from or inflict the same annoying conflicts blending textures do.
The issue with non blending is the blocky chunky nature of the textures, they are often quite ugly on the edges because the edges cannot feather. But as they are the type of texture that will render true when in layers the blockyness is something you will just have to learn to design around and live with.
Composite Blending Opacity: These are the more complex sheer opacities. They can use any shade of gray from pure black (clear) to pure white (solid). The various shades of gray, dark to light, going from clear to solid.
![]()
The big issue with using Composite Blending is that if more than one texture using them overlays another the texture the texture that is in front will render true while the texture behind it will completely vanish. You’ve probably already experienced this phenomenon in chat, you jump in a pool and part of your outfit vanishes, you may go bald if you look at yourself through a window, a club light passes over you and your suddenly nekid *gasp*
This is not an IMVU bug but instead a common rendering issue with many game type rendering engines. Most games are designed to hide this flaw but if you have a keen eye you will start to spot it and how they worked around it. But as IMVU has thousands of designers, us, there will often be many conflicts, as things are used together that were not designed to go with one another.
The main rules when using the Composite Blending setting…
-Only design in transparency when you absolutely need it.
-Only use it on one layer of a complete outfit (composite skintights excepted), layered furniture item or room.
-If your opacity is just black and/or just white turn it off, you dont need it!
Issues you will find on specific product types.
Opacity and Hair
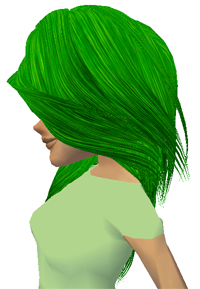
This is probably where you will get your first experience with opacity maps.
Most hair uses opacity maps, to get the fringe ends look to and to change the length of the cut.
The first conflict most folks have when making hair is the miss sizing issue. If you are reusing the meshers opacity then you need to make sure the texture you are using for the hair is the exact same size as theirs. If it isn’t you’ll have one of two issues, the hair will turn solid as if the opacity map isn’t there, or the hair will completely vanish.
If making your own custom opacities those have to be the same size as your texture
Hair by its layering nature does not play well with Composite Blending. For most of your hairstyles you will need to leave the blending setting off. While this creates ugly blocky ends the alternative is a real mess. Some meshs may allow for limited blending, say if the bangs are a different texture you may be able to use blending on those parts alone. Just know that the bangs will then vanish if the hair is viewed through something like a sheer veil.
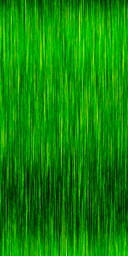
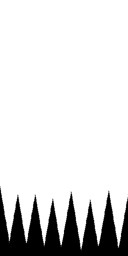
Hair Texture and Hair Non Blended Opacity Map
Hair Base, "Baby Hair"
IMVUs default hair base uses blending enabled opacity. This base will appear on many hairstyles and it is commonly referred to as "baby hair." It is that small band of soft wispy hair that starts at the forehead line and flows back along the skull to the nape of the neck.
Below are IMVUs provided default textures for this area. To create your own use this opacity map as a guide template as the where the narrow transition from black to white is. You will want to have a soft transition here vs the hard transition of standard non blended hair opacitiy. Remember to resize it to match your hair texture dimensions.

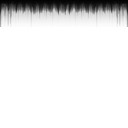
Hair Texture and Hair Blending using Opacity Map
For use wth IMVU Default Hair Base. (Shown in use below in the clothing example)
Opacity and Clothing
There are two types of opacity using clothing, a standard mesh or on a skintight composite body-part mesh. Opacities will behave very differently on each.
With a Standard Clothing Mesh when you texture it it will behave as expected, what you make black will disappear, what you make white will show. If you use Composite Blending on theses meshes they will conflict with other textures using Composite Blending. When you are designing your garment and you want a sheer part you’ll want to design it so only one layer of it is using Composite Blending.
Contrarily with a Skintight Composite Body Part Mesh when you opacity map something away, instead of disappearing it renders the skin texture instead.
When you wear a composite body part mesh the client will bake (make two layers into one) the garment’s texture with the skin you are wearing. Because it unites with the skin texture in this way you will not have any Composite Blending bugs with a skin composite mesh. A skintight composite mesh will always use the default skin map.
![]()
A Skin Composite Mesh will have the Skin Composite box checked
A garment can be one type or another or a combination of the two. Layered garments normally have a composite layer for the skin and then a layer(s) of a standard mesh(s) on top of that, as seen in the Fantasy Queen dress mesh by Cassiopeia.
The big warning here… If you are making a garment that is built of layers and has a skin layer benith it make sure that skin layer, no matter how hidden you think it is, has some sort of coverage to it, if there are AP bits no matter how covered those bits are they MUST be textured. Normally this skin mesh layer is a composite skin.
You can go about this three ways…
-Go fancy and make some undies for under there. (hardly anyone will know its there there but its a fun Easter egg if they do spot it)
-Duplicate the look of the main garment on the skin layer so if the outer layer vanishes they still see the basic look.
-Just use a plain solid color that is dominate in the garment and paint over the bits we’re not supposed to see.
Opacity and Tattoos
Tattoos are another product that commonly use opacity. You can have tattoos built into the skin, but when there not they are made as garments or accessories and those use opacity.
They can be made on a composite skintight garment in lew of clothing. This is more common for males than females for obvious topless AP reasons. Or they can be made as a separate mesh layer that hovers over the skin slightly. In either case they are made fundamentally the same.
You can use Non blending or Composite Blending opacity for a tattoo. Composite will get you a softer look but it will vanish if behind another composite blending using texture.
Use the UV Map that the mesher has provided to fit tattoo image. if the mesher hasn’t provided one you’ll have to do a bit of trial and error to see how they mapped it or you may just want to find a different mesh.
Common mistake maded with tattoos is the ugly halo. This is caused by having your tattoo image on a contrasting background. The image should belnd into the background instead.
Below is an example of a tattoo Texture made for a composite skintight male top. First is how not to do it, Second is the right way to do it.


An Incorrect tattoo texture and Opacity Map that will make a halo
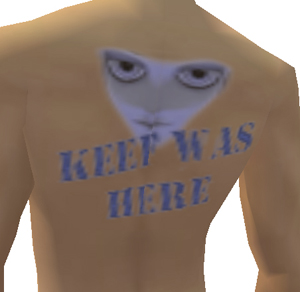
Example of above, The white background makes a white halo around the image


Corrected Tattoo Texture, the background matches the tattoo
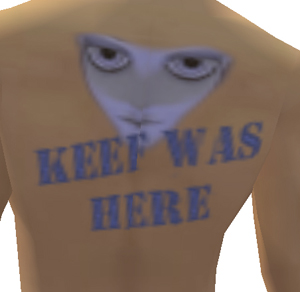
Example of corrected, the Halo is now blends into the image.
Opacity and Text
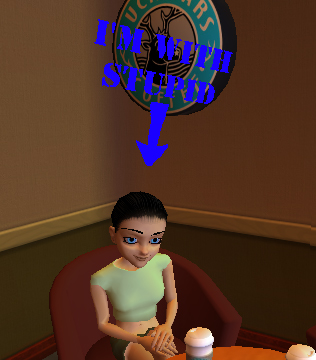
Most often seen in head signs, these letters that float in space use opacity.
You will need to make two images one with the color of the text and one as the opacity that will be a black and white version of the text, white text on a black background.
The most common mistake people make here is also the halo error, the text is surrounded by a glow of white. This is a very easy fix by making the background match the text.


Incorrect head sign texture that will create a halo and its opacity map


Instead make the background the same color as the text and the halo will blend in to the texture
Opacity and Plants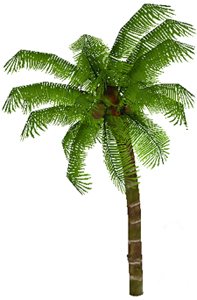
Plants almost always use opacity. Like hair plants often use layers so Composite Blending is not an option, leaving for clunky and chunky looking plants. Make your plant textures with these limits in mind and dont do anything that has too frilly or soft detail as it will be lost.
The mistake most make with plants is yet again the ugly halo. (See Tattos for the fix.)
Plant textures like tattoos should never be made on a contrasting background. You want the texture to bleed out over the edges so that the edges are the same color the plant. In short, unlike what you may have learned as a kid you want to always color outside the lines!
Opacity and Water and Glass
Water and Glass are classic Composite Blending Enabled Opacities. They by there nature are semi transparent so turning off blending is not an option.
The most common error people make here is when reusing a meshes opacity they dont make there texture the same size so it vanishes. Always make sure when using opacity that your texture and the opacity map are the exact same size.
The other stylistic issue I see often is folks making things too transparent. Water is actually pretty opaque, be sure to play with various shades of gray when making glass and water.
Opacity and Window Walls
Often times folks want to add a window in a wall when there is none, this can be done with opacity. Depending on how the room is meshed, mapped and material assigned will determine how effective the look can be.
In create mode adding the opacity is done easily by just clicking ‘Add’ in opacity box on the material you want to add it to. (if your still using the previewer you’ll have to make a new XRF) Click blending to enable the gray part of the opacity to function. Remember blending conflicts will apply.
One side effect here is that Composite Blending enabled opacities will render two sided, So your wall that was see through before will now have the texture also on the back side of it which may be problematic in some situations.
Make your wall texture with the window in it and make the corresponding opacity
For the Opacity you’ll need
The wall to be pure white
The window structure to be pure white
The glass the medium gray range
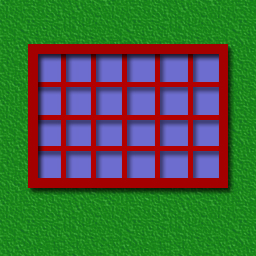

One Really Ugly Window Wall Textureand its Matching Opacity, try em if you dare lol.
Opacity and Reflective Floors
Reflective floors are all the rage, the thing is they’re not reflective at all, its really an optical illusion created by the mesh. There is literally a mirror image of the room under the floor that is revealed by an opacity using simi transparent floor.
Because these floors need to be semi transparent they must use Composite Blending, this severely limits the use of Composite Blending on anything else in the room so design your room and the items that will be made to go in it very carefully.
The main issue that is common here is making the floors too transparent. Because this is not a true reflection making them super transparent just makes the avatar and furniture items look like they are floating in space and not grounded at all, fine if you are making a space antigarvy room, but unrealistic if you are looking for something more realistic.
Folks tend to fall into the trap of more is more, more transparent more opacity more more more, when with rooms its often the opposite is much more effective. Sure it may look spectacular empty, but how is it going to look when filled with stuff? Remember the room is the vessel in which you put and do things, you dont want to overpower what will be going on it it.
Opacity as Light
Light Beams and Light Rays and other lightning effects are an effect that is often created with Composite Blending enabled opacity.
Using transparency and gradients can create fun light beam effects.


Light Beam Texture and its Opacity Map
Light can also be created by using, Blending Additive setting. Choose Blending and then Additive from the drop down menu. This setting won’t use opacity maps so you dont even need one to use it. Instead of using a opacity map it renders the whole texture as light. Additive works best in very dark environments, in bright ones it will be completely washed out. Play with it on a mesh and see what it can do. Try it in a brite room then a dark one and see how dramatically different the effect can be.
![]()
Chose which type of blending Composite or Additive and use the one that works best for the look and application you want to achieve.
Opacity as Shadow
Composite Blending Enabled Opacity’s are also what create the shadow under some furniture meshes. You may not have noticed why some pieces of furniture seem grounded while other don’t. Take a peek under them and see if there is a subtle shadow.


Shadow Texture and its Opacity Map
While thes shodws are great addition to a standaed room, put them in a refective floor room and they are a disaster as you then have blending on blending and a big hole in the floor.
There are meshes that are especially made for reflective rooms that have the mesh mirrored under them and no shadow. But if the piece you want to add to your reflective room set has a shadow you can get rid of it. Just replace the texture with a 2×2 black texture and its opacity map with the same 2×2 black texture, uncheck use blending and the shadow will be no more. Don’t forget you MUST uncheck the blending box any time you opacity something away or you will have texture conflict problems.

