Room Fog and Lighting
This tutorial had been on the most requested list for a loooong time. The hope it that it will better help you understand how the room fog and lighting settings work so you can start adding some fun effects to your rooms. Tutorial is now updated for Create Mode.
Lighting and fog are the things when used creatively can dramatically affect the look and feel of your room for the better. Think of Lighting and Fog as the seasoning of the final product, your room may only need a light touch or it may demand a robust bite, and that is where the fun and creativity begins. I generally design my textures with a strong idea of how the room lighting and fog will make them look and make my texture brightness and color choices accordingly.
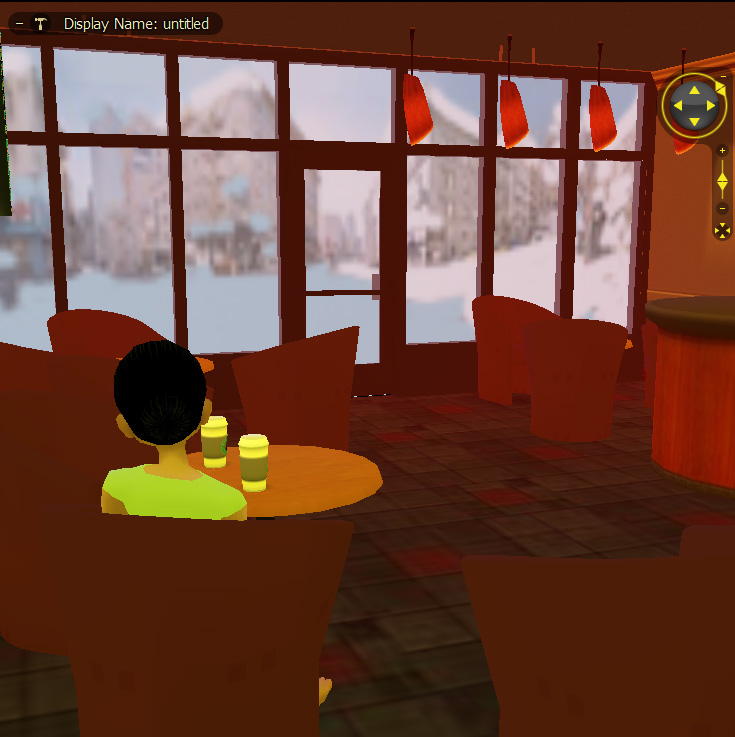
For this tutorial I will be using good o’l Buckstars (Pid 593) as my guinea pig. While seemingly a basic room Buckstars uses embedded lighting, ambient lighting, fog, as well as self illuminated and fog override textures, all the goodies we will go into in detail.
Before we dive into the tutorial lets first do a tour of Create Mode’s ConfigTab.
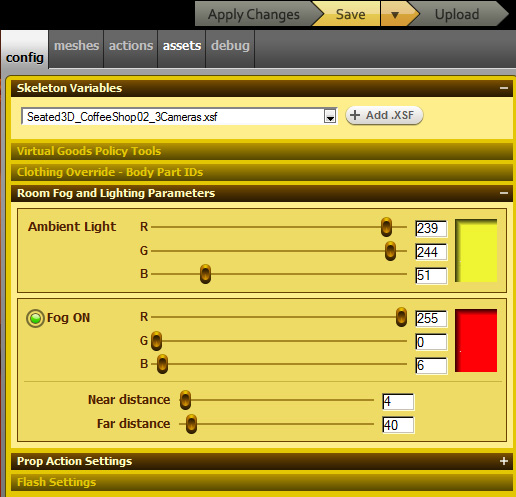
Config Tab Overview for Rooms
When room deving the Config Tab will look like this. Areas unrelated to room making are grayed out.

Skeleton Variables
Room.xsf file box and ‘+ add .xsf’ Button

The room’s mesh maker creates this file. This is the room’s bone structure. You can’t see it but it is the invisible base the room is built on. This file contains the room’s seat locations, furniture node locations, camera starting locations, any bone structure for room animations as well as the room’s embedded lighting, if it uses any. (more on embedded lighting when we delve into room lighting)
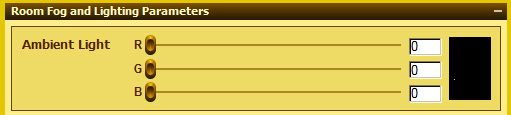
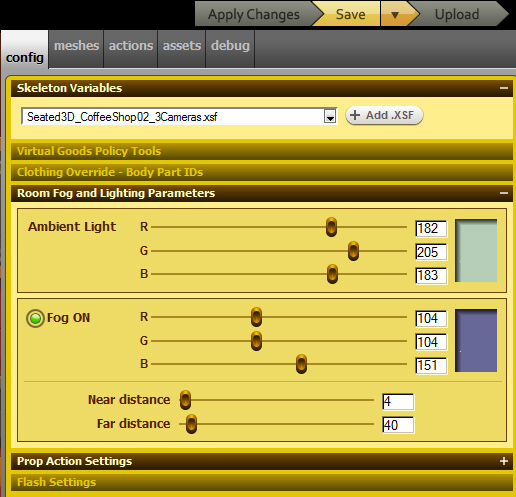
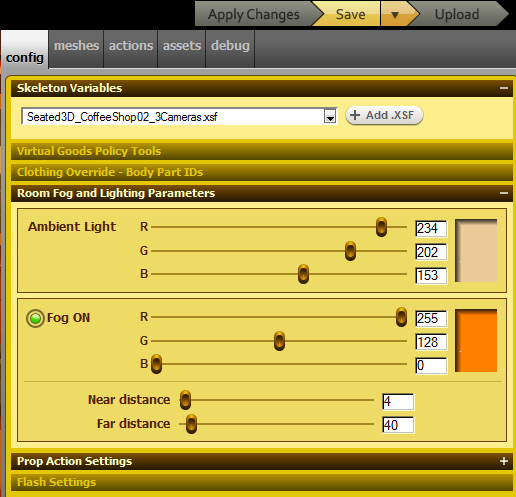
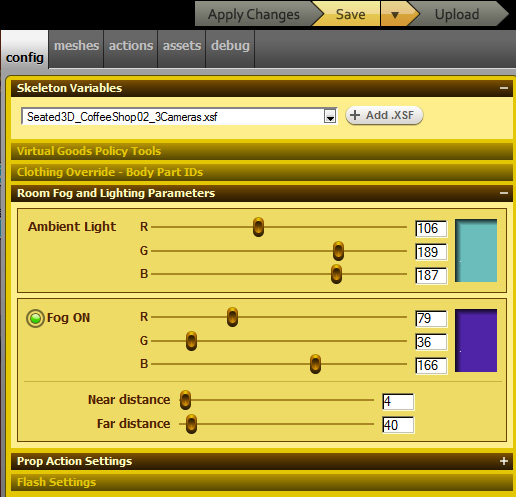
Room Fog and Lighting Parameters
Ambient Light

This is the overall color your room and everyone and everything in it will be tinted. If any texture is set to ‘self illuminated’ on anything of the room, in the room or on the avatars occupying it those textures will be un-influenced by this setting.
Fog
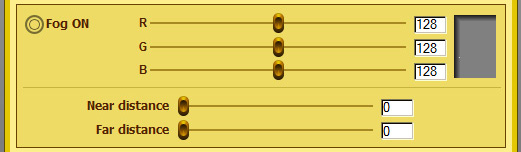
Fog ON radio button this enables for rendering in the room.
Fog Color Sliders
These sets the RGB color value your fog.
Note: If a texture is set to ‘fog override’ it will be un-influenced by this setting.
You can either type in the RGB vales for the color you want to use or use the sliders to pick it.
Fog Near & Fog Far
Near Sets the point at which the fog will begin to render from the camera.
Far Sets the point at which the fog becomes solid.
Synch all Actions & Sych props

This has nothing to do with fog or lighting but since were here anyway here is what it does. If a room is using several animations that need to be timed to match up this will be checked. It will cause all animations in a room to reset when someone changes a seat. When all we had were locked rooms this was very useful, but now that those kinds of actions more common to furniture than rooms room’s its more used on furniture than rooms.
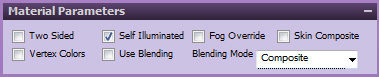
Meshes Tab
There are also there are two settings on the Meshes Tab you need to be aware of that are directly tied into the rooms fog and lighting.Self Illuminated Any texture with this box checked will be unaffected by the room’s lighting and will render at 100% brightens
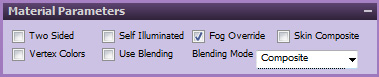
Fog Override Any texture with this box checked will be unaffected by the room’s fog settings.
Room Lighting
A room can have three types of lighting Omni, Spot and Ambient
Omni lighting is a light source set by the mesher. Not all rooms will have an Omni Light. This light is embedded into the xsf and cannot be edited by anyone but the mesher. A Omni light is a point source light that will radiate from that point in all directions. Its color is also set by the mesher and unchangeable. This is generally used as an accent light.
Spot lighting is also a light source set by the mesher. Not all rooms will have a Spot Light. This light is embedded into the xsf and cannot be edited by anyone but the mesher. A Spot light is a directional source light with no point source that will shoot light all in one direction across the whole room. Its color is also set by the mesher and unchangeable. This is generally used as an accent light.
Ambient lighting is set in the Previewer, ambient light is the only lighting a texturer has control over. But don’t panic, this is also the most powerful lighting option!
How to See a Room’s Embedded Lighting
First thing you will want to do when deriving a room is to see what, if any, embedded lighting the room may already have built into it. You will want to know if the room has embedded lighting, what those lights are doing and what colors they are. Once you know where you stand you can then make ambient lighting choices to either highlight that embedded lighting or obscure it.
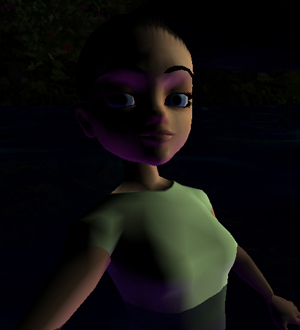
To see if a room is using Omni and Spot lighting all you have to do is turn off the Ambient room lighting, if the avatar goes black there are none, if you see lighting effects on the avatar that is the embedded lighting that you will have to deal with.
Open up Buckstars (PID 593 in the Previewer go to the Special Tab.
On the Scene Ambient Light color selection box and choose true black. (RGB 0 0 0)
Hit ‘Apply Changes’ and you will see the Embedded Lighting Buckstars uses.
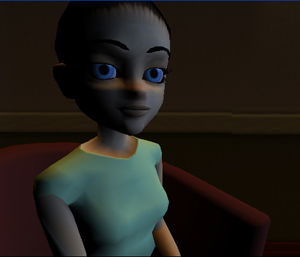
Looking at the avatar there are two embedded light sources hitting it. There is a steel blue light shining in from the window as well as a warm amber light coming from above. So we know this room has embedded lighting in it, and whatever lighting choices we choose to use must also incorporate these lights into it.
Also take note that the widow, which is set to self illuminated, is unaffected by the ambient room lighting setting.
Here are some more Embedded lighting examples.
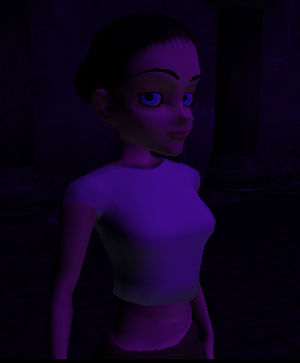
Dramatic Purple Embedded Lighting, spooooooooky
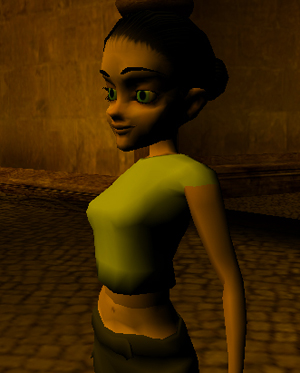
Warm Gold Embedded Lighting
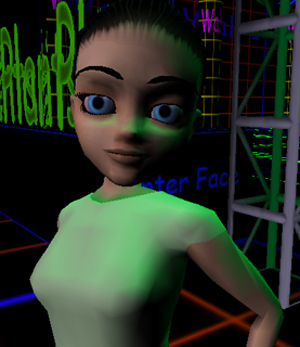
White and Green Embedded Lighting
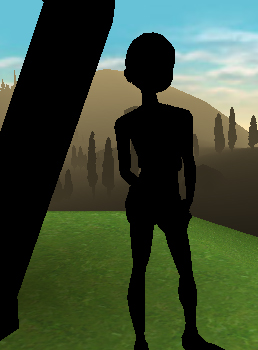
No Embedded Lighting, Avatar turns all Black
So now that you know what you are working with you can make your ambient lighting choices to complement what the embedded lighting is doing. And you also know that you can go no darker than what you see now.
Personal Thoughts on Room Lighting
If you are truly going for a non colored neutral look you should aim for a medium grey for your ambient lighting instead of a true white. True white is a very harsh lighting to be under and unless you are making that blindingly bright white room from The Matrix I wouldn’t recommend it.
Personally for a neutral I would recommend not staying to a true gray but leaning either to a subtle blue, rose, amber or brown tint.

Also know that any item set to glow will not really pop unless the room’s ambient lighting is in the medium range so if you are looking for glowy texture effects or to see furniture lighting effects you MUST dim down your ambient lighting. The darker your ambient lighting is the more your emebeded lights and self illuminating textures will pop!
My Retextured Version of Buckstars Coffee
Shadowless Rooms
A shadowless room is a room with no embedded lighting sources and its ambient lighting set to pure white so there is no lighting effecting anything in the room.
While ‘shadowless’ may be preferred by some folks for displaying their work in product shots making them render flat instead of in a lit and shadowed space, for true to actual use it’s generally makes for a very harsh look and I wouldn’t recommend it for a room for actual chat use. Shadowless creates an unrealistic flat look that is not the ‘reality’ of what folks will see and use in IMVU. If using anything ‘shadowless’ know that the avatars and items in them will look very different that they will in normal use.
Room Fog
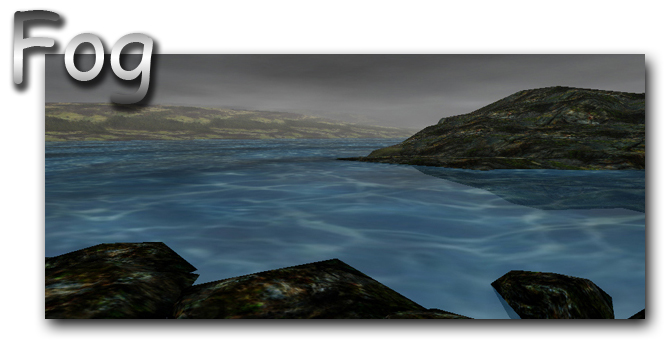
Fog is what will give your room ambiance and depth. Without it a room will seem flat and lifeless, with it a room can have a sense of atmospheric depth that really adds character to a scene. EVERY outdoor room should be using fog, and most indoor rooms would also befit greatly from a subtle use of fog.
Fog is completely controlled by the Previewer so unlike lighting you have complete control over how it will render in your room.
There are three fog settings to play with
Fog Color Sliders, Sets the color of the fog
Fog Near, Sets where the fog starts to render from the camera
Fog Far Sets the point at which the fog becomes opaque, so solid you can no longer see past it.
Lets open up Buckstars again (PID 593) and take a closer look.
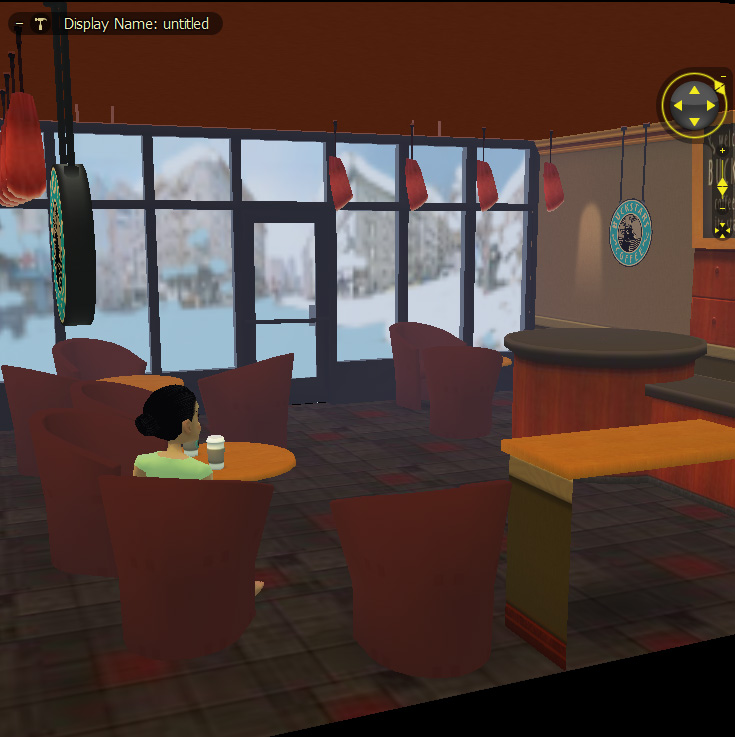
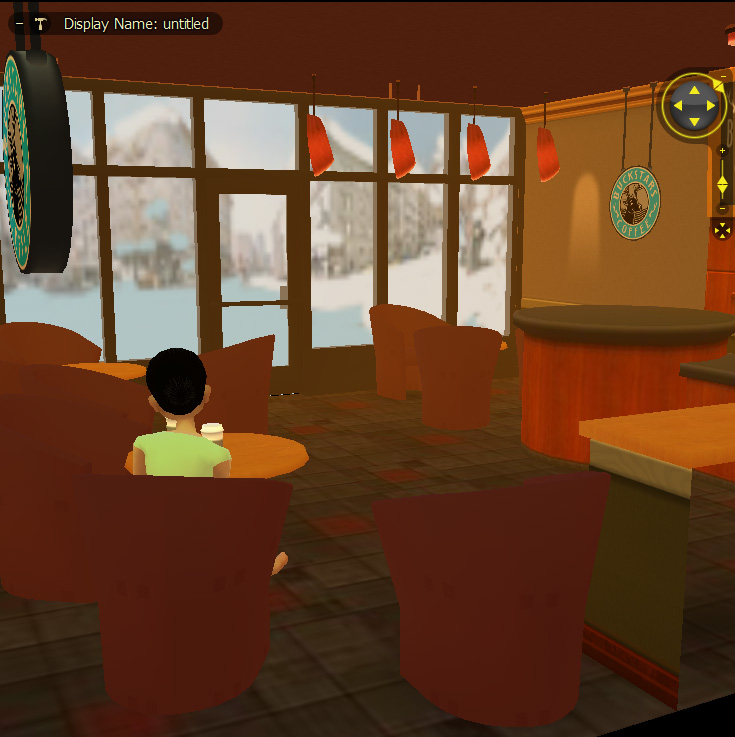
First take a look and what Buckstars is already using….
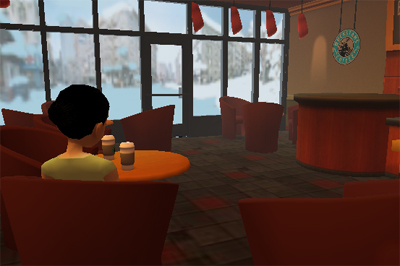
Subtle aint it. It has just a touch of a neutral brown and you probably wouldn’t have even known it was their unless looking for it.
Yet take it away (Uncheck ‘fog on’ and hit Apply Changes) and the room seems much smaller and looses its life and depth, an almsot too clean looking.
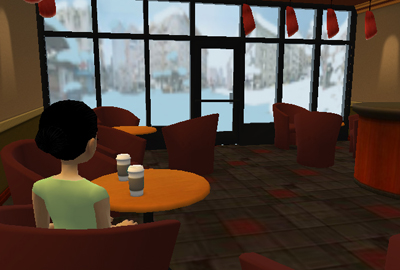
When fog is subtle like this it is generally imperceptible but your mind senses it and it just add that awareness of the air almost on a subliminal level, and that will make a room ‘feel’. You can dramatically alter and amplify the feel of a room by your fog choices, warm and cozy, dim and smoky, dark and moody, dreamy and hazy, cool and misty, bright and sunny.
Lets play with the how Fog settings work
Derive from Buckstars, PID 593 and go to the Speical Tab.
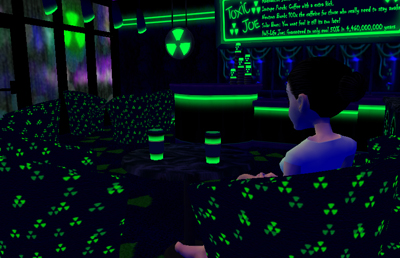
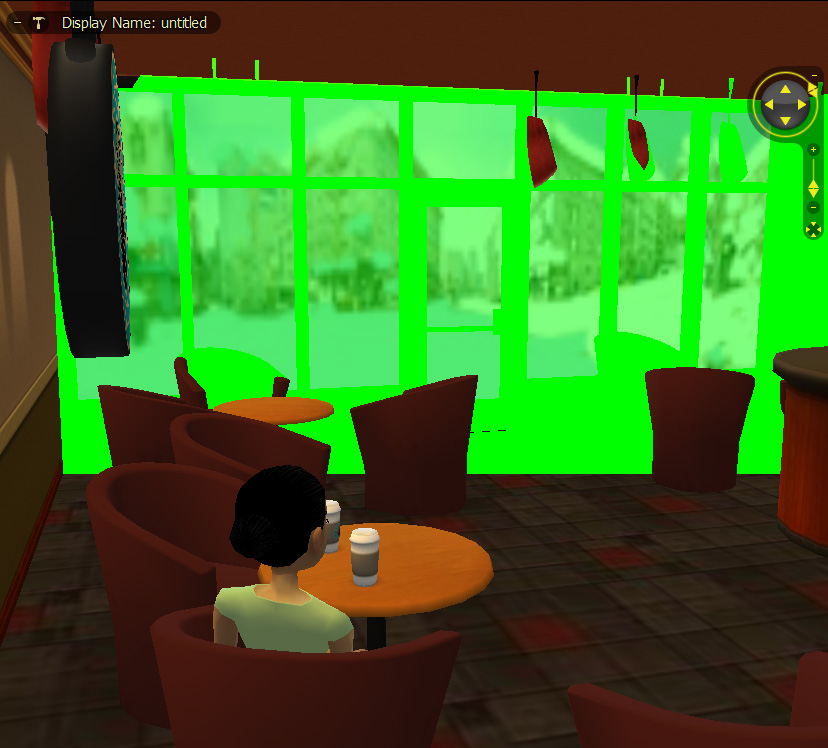
Make sure ‘fog on’ and ‘fog really, really on’ are checked and then pick a really obvious color so you can really see what is going on. I’ll use a neon green.
Set Fog near to 0 and fog far to 10 and then hit Apply Changes

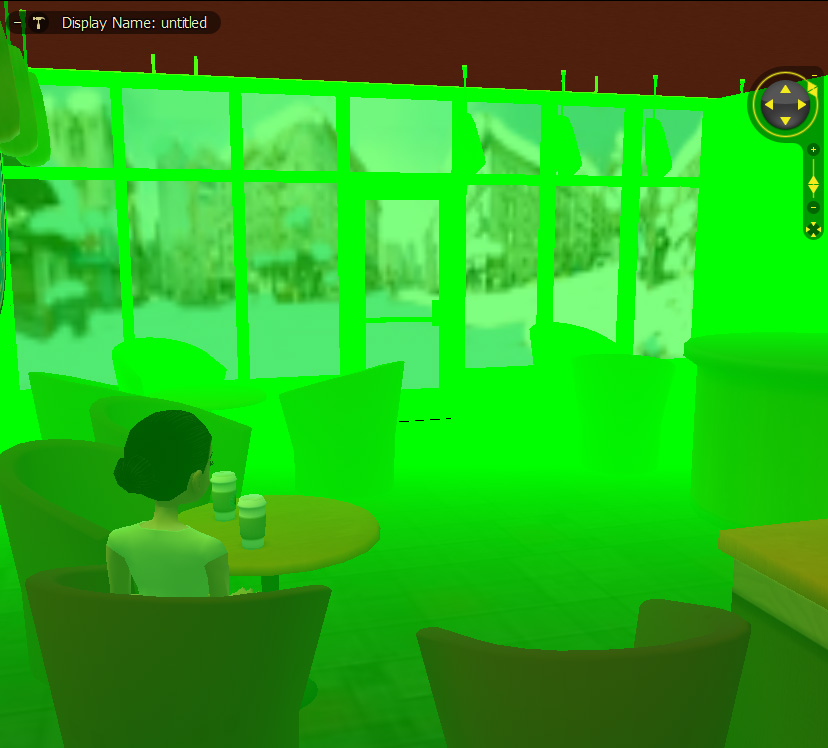
Here you can see the fog is rendering thought the whole scene ending in a solid color in the near distance. Also note the widow which is set to fog override renders trough the fog as if its not there.
Now Set Fog near to 10 and fog far to 10 and then hit Apply Changes

Now we have the fog just rendering in a narrow band, the foreground is completely clear and the back wall is solid green, the window is unaffected.
Now set Fog near to 0 and fog far to 50 and then hit Apply Changes

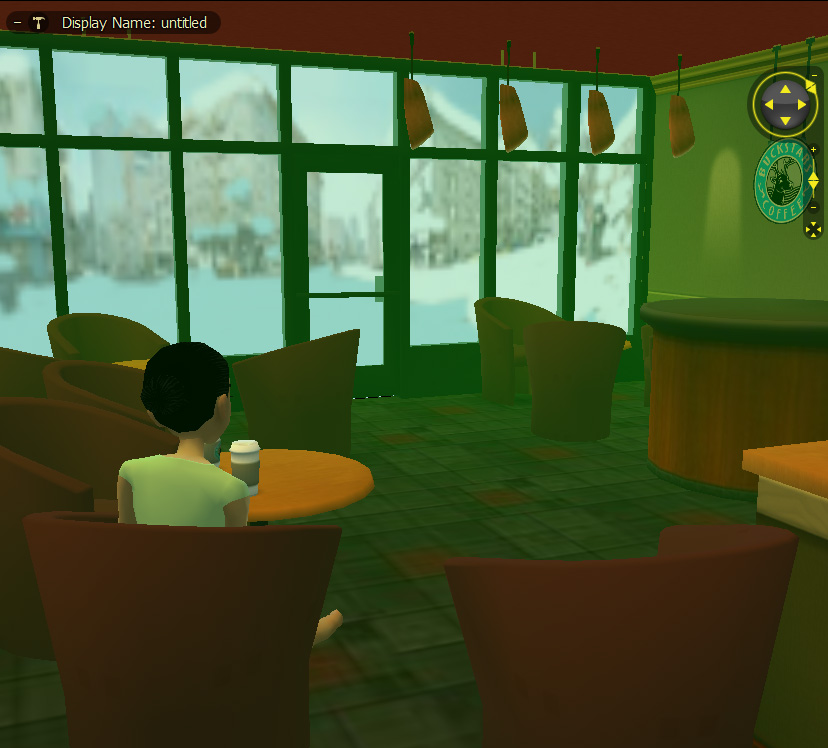
Now we have a soft haze, the fog is rendering though the whole scene but the fog far setting is set to a point well past the back wall so we only see a mist of fog and never see a solid wall of it.
Play Time!
So now go ahead and play with different colors and saturations of colors of lighting and fog and see what interesting looks you can come up with. The trick is coming up with a good blend to meet your theme.
Finding the right balance of color and distance for how you want your room to feel takes a lot of experimenting. Plan on spending a good amount of time just messing around with different fog looks. Take notes as you go so you can recreate the cool looks you come up with.
Cool Feel
Warm Feel
Rainy Day
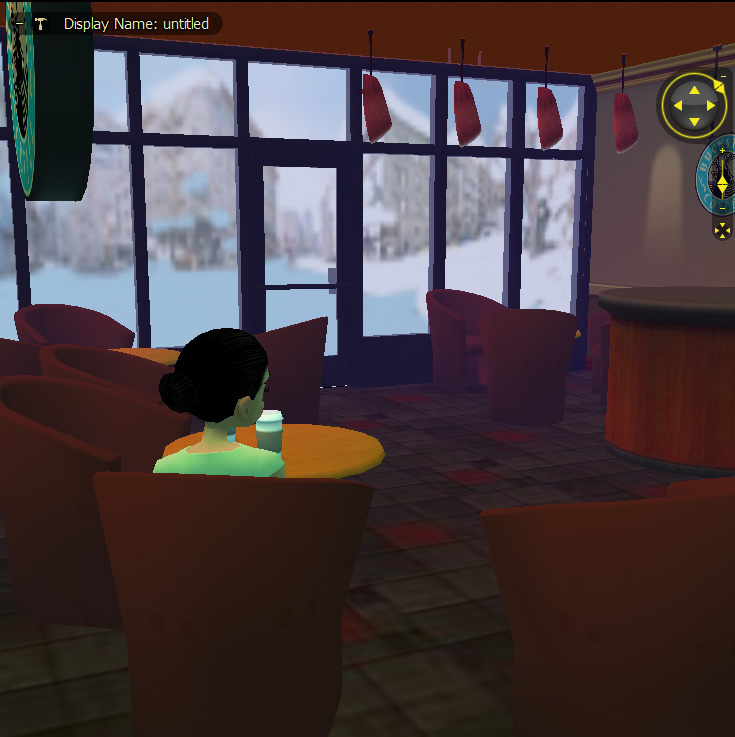
Sunset
The Wrap Up
So that’s about all there is to it. The main thing to remember for a true cohesive look is to keep your textures and lighting choices in similar color families so they will logically go together in the same space. Outdoor rooms are where you can really play with lighting and fog to their fullest. It would be a very rare outdoor room that wouldn’t be improved by having fog in it. Whether your room needs a sunny haze, a cool fog, or an inky black night your lighting and fog choices can achieve it transforming a bland space into magic.
![]()