How to Make a Shirt by Retexturing Using Photoshop 7 (beginner)
-How to use the Mapping Template.
-How to make a basic starter texture from scratch in Photoshop.
-Photoshop tricks.
I’m using Photoshop 7 on a PC instillation.
This tutorial is specifically aimed at the Photoshop user. The tricks and tools used may not be available on other programs, however the basic ideas can normally be emulated on other programs.
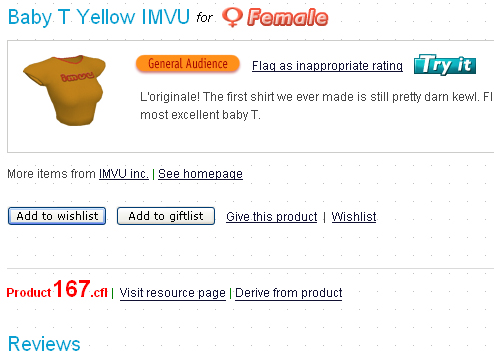
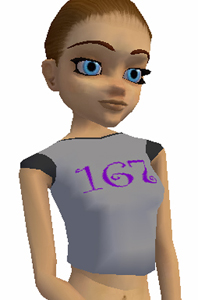
We’ll be making a new version of Baby T Yellow IMVU product # 167
Before we begin
Remember, you must be a VIP and register on the developers page before you can submit a product to IMVU.
Now Read and DO the IMVU T-shirt Getting Started Tutorial
You should now know basically how the previewer can swap out a texture and how to submit it.
So, How do how do you make that texture in the first place?
Opening the texture template and Photoshop
Download and unzip the shirt’s texture template. Links to IMVUs Product Templates (if they have them) are located on the mesh’s Product Page. Be sure to put it where you can find it.
Open the shirt’s PSD file you downloaded in Photoshop, you might get some corrupted data errors, just click OK through that.
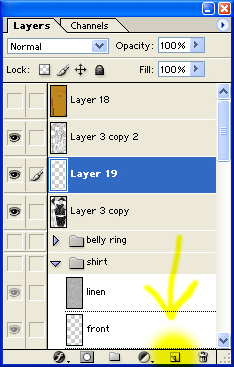
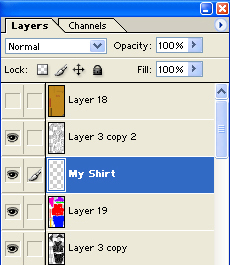
In Photoshop you will want to have the Layers panel visible, if it’s not, open it by going up to windows and then checking layers.
When the eyeball is on the layer is visible, off and it’s hidden.
The layer highlighted in blue is the active layer, be sure when working you have the correct layer active.
Switch off and on the different layers to get used to how it works. Go ahead and expand all the file folders and see how each layer effects the image.
Making a test texture wrapping shirt texture.
Depending on how familiar you are to skinning you might want to skip this step, but it’s something I do with every new mesh just to get to know it better.
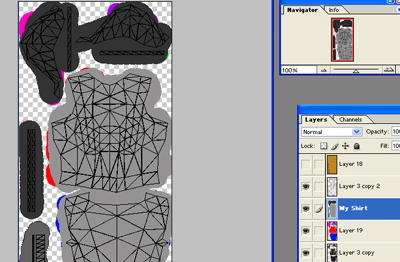
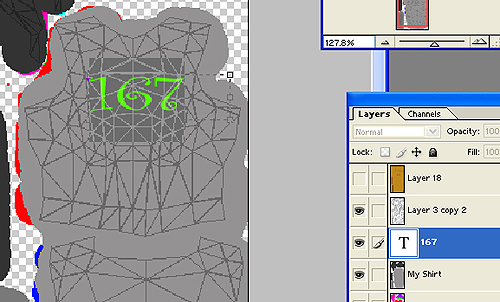
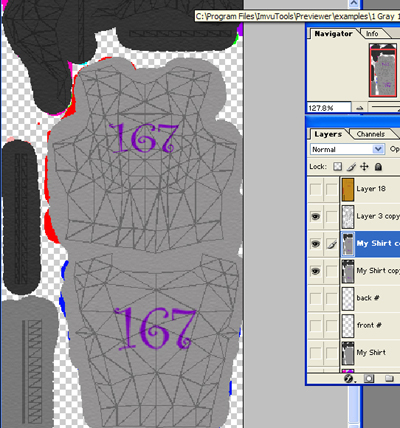
Switch off all layers but the one that had the mesh pattern template on it. (It’s the one with all the lines) Then select it so it’s active.
On the layers panel drag the opacity and the fill to 100%.
Make a duplicate layer, Up top in the toolbar Layers, Duplicate layer, OK (FYI were going to be doing this A LOT)
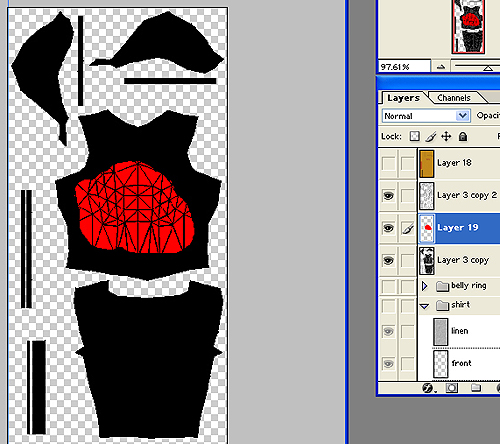
Now were going to inverse the colors, go to Image, Adjustments, Invert.
Now you have all Black lines on white.
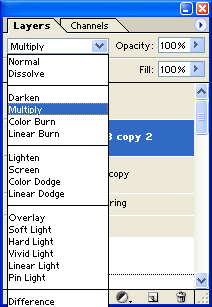
Go back to the layers panel and just below where it says layers there is a box, switch the new layer to Multiply.
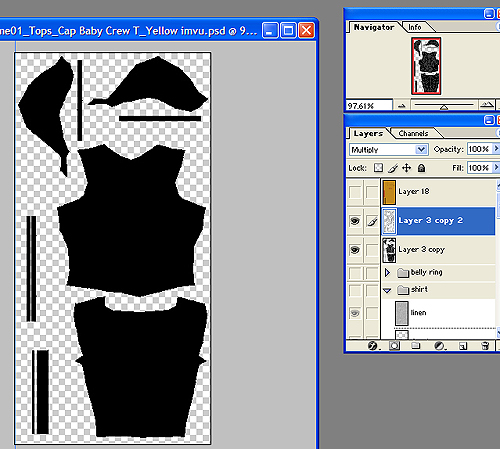
Everything should have turned black. (Don’t panic, it didn’t really ;)
At the bottom of the layers box there is a make a new layer shortcut, click to make a new layer. Drag that layer in between the two grid layers.
Here’s the PS is cool trick! Click on your color pallet and select a bright color.
With the new blank layer active, color in the main body of the shirt using the pencil tool.
This is the ohhhhhh moment, cool eh :D
Multiply makes the white transparent and what is below show through.
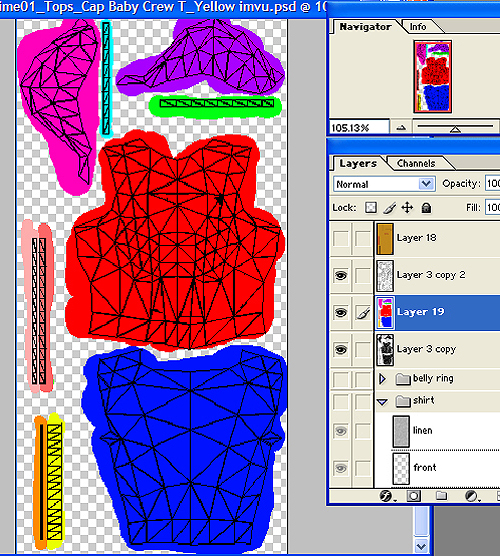
Color in each element of the pattern a different color and no you don’t have to stay in the lines ;) in fact It’s better you spill over a bit, I’ve found the IMVU templates need a bit of spill.
(Side note: Multiply is the tool comic book colorists use to color in the ink work of others, if you’re in to drawing comics or anime, give it a try on your line art and you’ll fall in LOVE with it.)
Now’s a good time to save, use ‘save as’ not ‘save’ for you’ll want rename it and preserve you’ll want to put it in a location you can easily get to. Save it as a PSD so that all the layer information is preserved.
We want to save it again but this time as a JPG. The JPG is what we will be using in the Previewer or Create Mode
To save it as a JPG click File ‘Save as’, then change the format to Jpeg and save.
Pick the highest quality for the save and click OK.
Put it in 3D to View (If you skipped doing IMVU’s getting started tutorial this is the time you’ll need to go back and actually DO it!)
If you have an older slow computer go ahead and close out Photoshop, if you have the RAM and possessor to support it though it is nice to keep it open. You will be jumping back and forth OFTEN.
Open the product for editing
If you are using create mode you’ll want to click derive and type in 167 as the product number.
Add your new texture just like you did in the getting started tutorial then hit Apply Changes
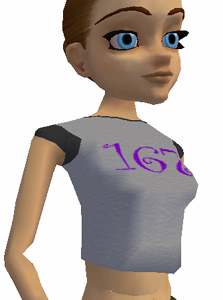
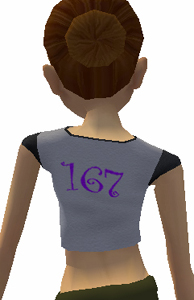
The model will now be wearing the texture you saved on the shirt.
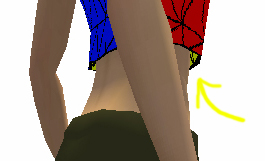
Zoom in all around her and look at where all the colors ended up.
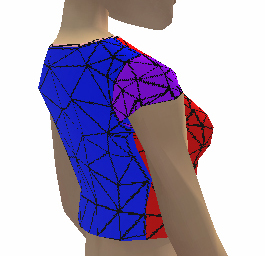
This is my first time using this mesh, I can see now, the under inside is textured differently than the face. I know which sleeve is which. I can also see that yellow bit is the inside of the bottom
I somtimes will grab a few screenshots of the mesh. (ALT + Print Screen and paste into new image in Photoshop), If you have a printer handy you might want to print out the pics for quick reference.
back to Photoshop…


Make Your Shirt.
Now we know how the mesh works, we can make our shirt.
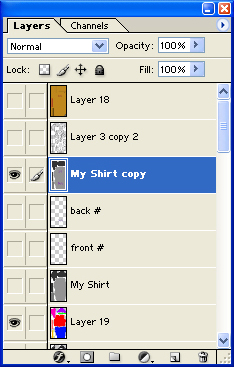
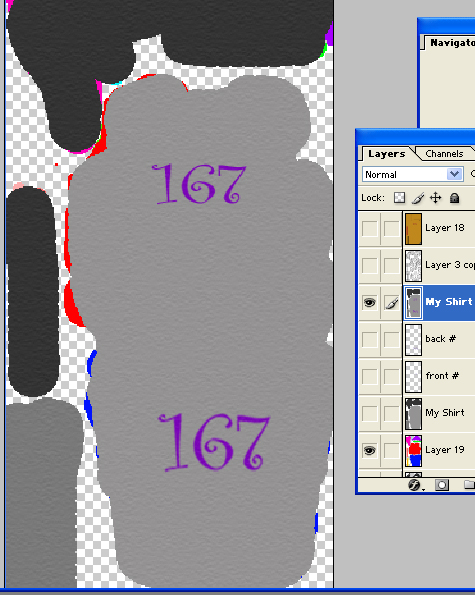
Make another new layer and put it above the test color swatch layer and below the grid that is set to Multiply.
While we’re here, before we make a huge confusing mess, let’s label that layer, hover over it in the layer panel. Right click and click layer properties, rename it, my shirt. You can change the names of the other layers if you wish too. You can also delete all the layers but the templates that came in the original file, all we will be using from the original file is the mesh templates.
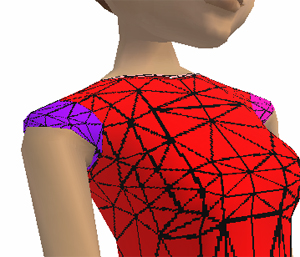
With that new layer active. We can start painting our shirt. With having the map on in multiply mode above us we can see where we are in the mesh.
I’m going make a 2 tone gray jersey look shirt. I color in the body a light gray and the trim edges and sleeves a dark gray. The part that is the inside bottom I colored just a shade darker than the body.
Save save save, then switch off the mesh layer so you just have the colors and save again to the previewer as a Jpeg, to test it out.
This is when it’s cool to have enough Ram and processor to run both programs at once so you can quickly jump back and forth. I’m spoiled in that I also have two monitors running so I can have the previewer or client up on one and Photoshop on the other and can see both at once.
How’s it look? It could be done now if you wished but let’s do some more stuff to it.

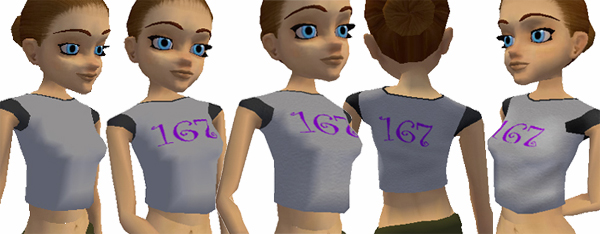
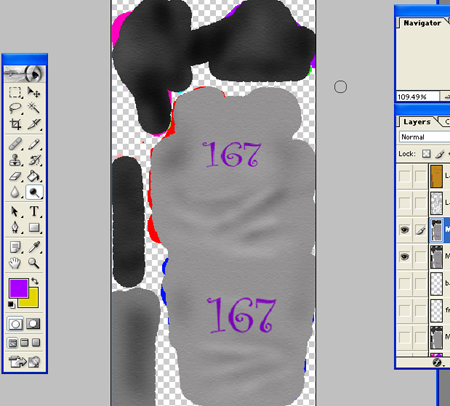
Adding Text
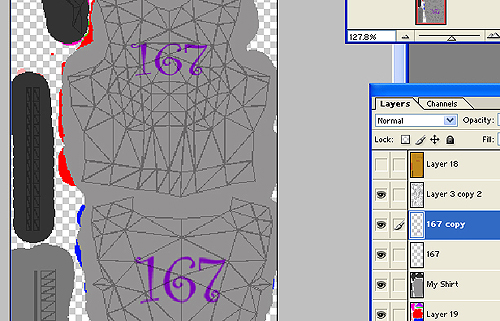
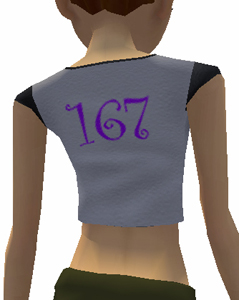
What’s a jersey without numbers! Use the Type tool and add some numbers. Any font installed on you computer can be used. I find it easer to preview the fonts in MS Word because they give you a little preview when scrolling through them, I’ll pick it out there then select that one in PS. You can change the color size strength and such up top when the T tool is selected.
Once you get it close to what you want, go to the text layer and right click on it and select Rasterize layer. This changes it from editable text to an image layer. Once it’s Rasterized you can’t go back to the text tools, If it’s a lot of text you might want to make a duplicate layer of it and hide it before you Rasterize so you can go back if needed without having to retype it all.
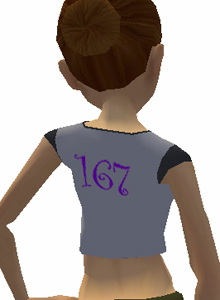
I made a duplicate layer and moved it to the back area of the template so I could have the numbers on both the back and front. But then when I tested it noticed, like most mesh maps, the front and back are different scales. I need to resize the numbers bigger to match the front.
To resize a layer, make sure that layer is active, go up to Tools, Edit, Transform, Scale. (These are one of my favorite tool sets in PS. Play with them all when you can. Distort alone is invaluable if you ever get into photo sourcing.)
SAVE your PSD and re-save it as a Jpg to the Previewer and test it out.
Some would stop here but will we??? noooooooo lol

Adding Texture
It looks flat so let’s play with another set of Photoshop tools.
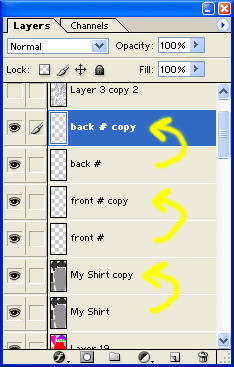
First, make copies of the fabric layer and the number layers. Keep one set of each and hide the rest as backups this is when labeling the layers comes in handy.
(Shortcut for this if your program has it is to use the ‘Copy Merged’ option, use that then hit paste and you will have a new layer with all you had visible on it.)
.
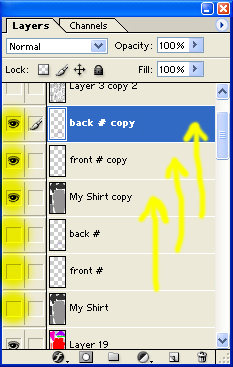
Take one of each that is active and put them all in a row.
Now were going to merge those layers. Turn of the mesh pattern if it’s on. Make the top visible layer active, Go up to Layer and merge down. (Ctrl+ Alt+E) Keep doing that until the new copies are all one layer.
Turn the little eyeball off and on on that layer to test that you got all of the layers and nothing you didn’t want. Use Edit, Undo if you went to far.
With that layer on make yet another copy of it… yeah yeah, trust me you’ll thank me later.
Now go up top, Filter, Texture, Textureizer.
By default you’ll have some cool textures loaded, play with them all and the settings. I will use the sandstone on a very light setting. Scaling 50% relief 2. Play with it, no set in stone rules here, try canvas and burlap too.
To me it seemed a bit it harsh for what I was going for so I went back to the layers panel and adjusted the fill down to make it softer. This shows a bit of the copy we left under it once happy I merged the two layers into one.
SAVE your PSD and re-save it as a Jpg to the Previewer and test it out.
Cool eh!
Are we done now??? NOOOOOOO lol
Adding Highlight and Shadow.
Turn back on the mesh template layer to see what’s what. I’ve turned the Fill down on the template layer so I can still see the lines but can also see beneath.
Now to meet my most favorite of all Photoshop tools, Dodge and Burn!
Dodge Lightens
Burn Darkens
Ok, make…. (insert drum roll here)… yes you guessed it a duplicate layer! If you go to far with this next step you’ll want it to start over again, trust me, I did :D
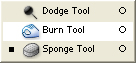
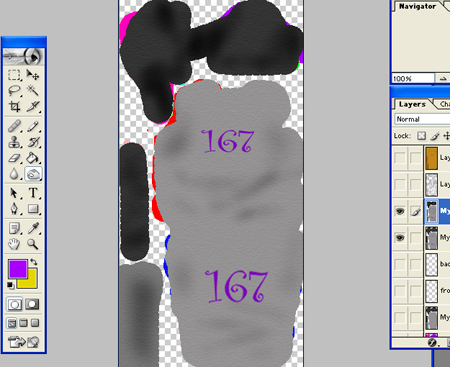
Go over to the tool bar, every tool that has a little arrow in the bottom right corner has more tools hiding below it. Click and hold or right click on a tool with an arrow to show the hidden ones. Dodge and Burn are hiding under sponge.
Start with Burn, looks like a hand. Up in the top toolbar turn the exposure way down to 10-20%. This is easy to overdo.
I shaded the armpit areas, under the bust, added a bit of variation to the trim and added a bit of shadow to imply a loosely fitting shirt near the bottom.
SAVE your PSD and re-save it as a Jpg to the Previewer and test it out.
:D
Dodge looks like a black magnifying glass. Again set the Exposure way low. Less is more. Now lightly hit all the spots that would be highlighted, shoulder caps, mound of chest, top of loose folds.
SAVE your PSD and re-save it as a Jpg to the Previewer and test it out.
Are we done now?? Okay, Alright for now you’re done. If I were selling it I’d rework the folds a bit more to get them to hang better and add stiching lines and seams but for a tutorial this should be good enough for you to get the idea of how they’re done.
Save the product and you’re ready to upload. Oh and don’t forget to take you catalog shots! (ALT + Print Screen and paste into new image in Photoshop then crop and resize down to 100×80 pixels and save) IMVU has a great tutorial just on catalog shots, How to: Catalog Icons.


Remember
I made a simple basic shirt just using the tools in Photoshop. You can add imagery and photosourcing and go as complex as you wish. Both Dodge and Burn can really spring to life any photosourced garment.
Always keep a copy of your PSD’s with all the layers. You’ll never know when part of one garment would be great in another. And LAYERS LAYERS LAYERS, think of it as a history as you go, maybe the base of one thing can get tweaked different way and become another, Keep a layer of each step and its like going back in time. It can be a big timesaver giving you a jumpstart on other projects.
On Photosourcing, the act of using photographic texture sources on textures, just like stickers copyright is always an issue. There are many free open source image sites just for meshers to use, and use them, that’s what they’re there for. Please read the terms of use on the sites, some are free free others have restrictions. Taking a picture from a magazine, catalog or using another games textures and making a garment from them is a definite copyright infringement. Take that look and make something with using the idea of it make it with true free sources and your good to go.
![]()