How to Make a Cell Texture for Cycling Animations (Intermediate skill level)
This is a supplemental tutorial for my Materials and Mesh Tab tutorial to go into detail on how to make a cell framed texture.
Types of Effects Covered in this Tutorial
Photo Montage Posters
Video Screens
Adding Opacity
Color Changing Textures
Pixel Glitter Effects
Animated Glitter Textures
This tutorial is written for Photoshop CS, while it is focused on Photoshop’s tools many of the techniques can be adapted to other programs so long as those programs support layers. If your program can not do the exact techniques shown here you should still be able to apply some of the concepts.
This tutorial assumes you are already familiar with your image making software, its basic tools and texture making. If you are not already familiar with working with layers, layer manipulation, cropping images, resizing graphics, importing multiple images into one document, garment texture making and opacity map creation, please research into how that is done for the software you are using. Basic Previewer use and taking of in client screenshots will also not be covered, you will want to already be familiar with all of these aspects of developing to use this tutorial.
Use of the sample textures in this tutorial: You may only use the textures used it these tutorials (or derivatives of them) on derives of my meshes. Use of these textures in whole or in part on other products or other platforms is not permitted. The point of these tutorials is not to supply you with finished textures but to illustrate to you how to make your own!
Overview
What is a Cycling Animation?
Unlike a scrolling animation which slides the image along the x and/or y axis a cycling animation reveals snapshots of parts of texture the end result is the same to that of watching a film. In a cycling animation only part of the texture is shown at a time in a stop motion manner.
Think 35MM Film
Think of how a film projector works, the film slides though the projector’s gate, pauses for a split second behind the lens, a douser opens to quickly flash a light though the film’s frame while its paused, it then it advances to the next frame and the next. To the eye the image appears to have movement but when you break it down to its parts all it is is just a bunch of individual pictures shown in a row.
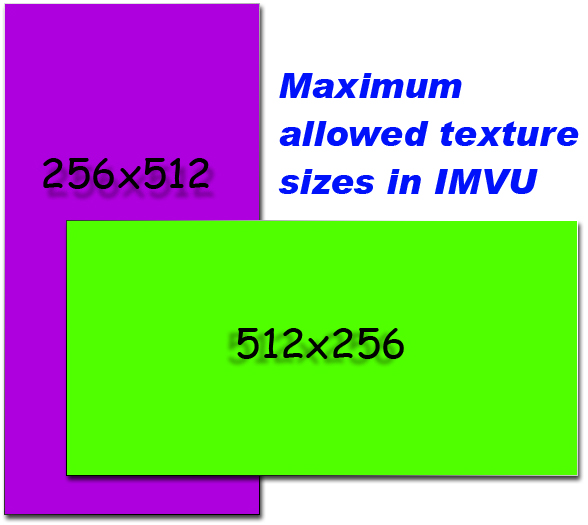
Because of the specific mathematical calculations used any texture used in a cycling animation must be set up properly in order to function so before we begin I want to reiterate IMVU’s texture sizing restrictions. While you may have gotten away with ignoring them with other things if you ignore them with cycling your animation will not work.
IMVU uses the 2x Texture standard sizes those are 2, 4, 8, 16, 32, 64, 128, 256 and 512.
The maximum size of a texture that can be used on IMVU is 512x 256 or 256x 512.>
If you don’t stick to these size restrictions IMVU will resize them for you and break your animation.
Texture Size Restrictions
Additionally:
The dimensions of each cell must also be in the 2x standard.
2, 4, 8, 16, 32, 64, 128, 256 and 512.
-The number or cells used (frames of the animation) must also be in the 2x standard.
2, 4, 8, 16, 32, 64, 128, 256 and 512.
Don’t worry this will make more sense as we go…
Products that Won’t Animate
There are products that animation will not work on, its best to know these limitations before you begin a project so you don’t waist time trying to make something that ultimately won’t work.
Skin Composite Meshes: Any worn product that uses the Skin Composite setting will not animate. A Skin Composite product is actually using the avatars skin file information and its animation settings so that this skin will render true with the item. If you want animated clothing you need items that do not have the skin baked into them. Layered products and products that use maps other than the default skin map are what you need to look for.
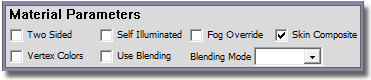
Skin Composite using texutres will NOT animate
‘Anyskin’ Products that use the skin map to match the skintone to the mesh also use the Skin Composite setting and will not animate.
Eyes: Eyes used to animate when we all wore the default head, now with custom heads being the norm they don’t work reliably. Hopefully IMVU will fix this in the future but for now its best to leave eye animation alone or else be ready for a ton of customer ‘help me’ IMs.
Design and Being Realistic
Before you start thinking of all you want to do with animations be very aware of those IMVU texture size restrictions and what they realistically mean.
You will not be able to have super detail and cycling animation, there just are not enough pixels available to have both.
For these first examples I’m using a square ratio but any of the rectangular 2x ratios will also work. We will use some rectangular sizes in the demos.
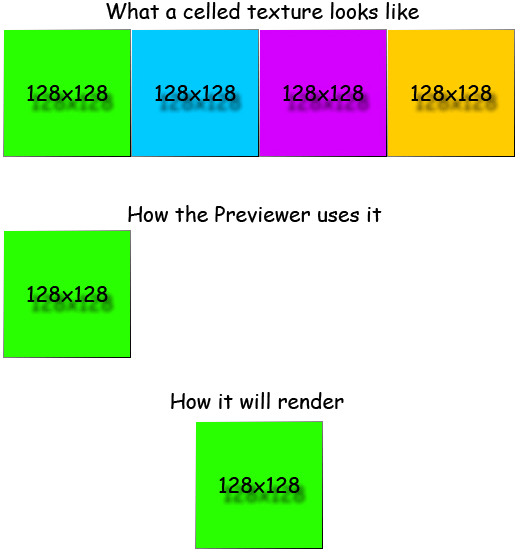
-If you want a 256×256 cell you can only have two animation frames
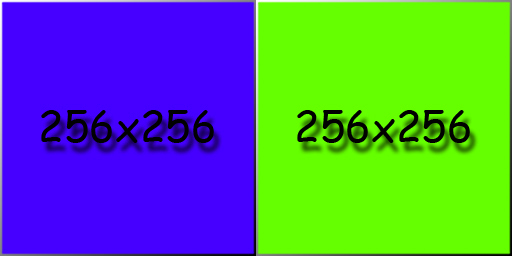
Height 256, Width 256, Cells 2
-If you use a 128×128 cell you can have 2, 4 or 8 animation frames.
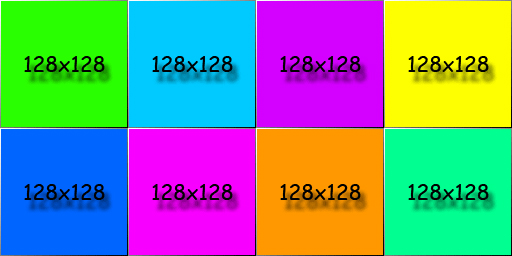
Height 128, Width 128, Cells 8
-If you use a 64×64 cell you can have 2, 4, 8, 16 or 32 animation frames.

Height 64, Width 64, Cells 32
-32×32 and you can get up to 64 frames, 16×16 and you can get up to 128 frames, etc etc
The smaller the cell the more frames you can have but the more you are limited to just color effects vs any sort of ledgable texture.
Cell Frame Texture Tutorials
While you can jump ahead to the type of product you want it is best to do these tutorials in order as each will be borrowing steps from the last. It is recommended you do them all in sequence at least once if you’ve never done these kinds of textures before.
How to make a Photo Montage
A photo slideshow is probably the easiest thing to make as your images don’t have to be perfectly lined up. For our first task we will make a poster texture with eight images.
Image Prep
-Pick your mesh, I’ll use my Stage LED mesh, PID 752501 .
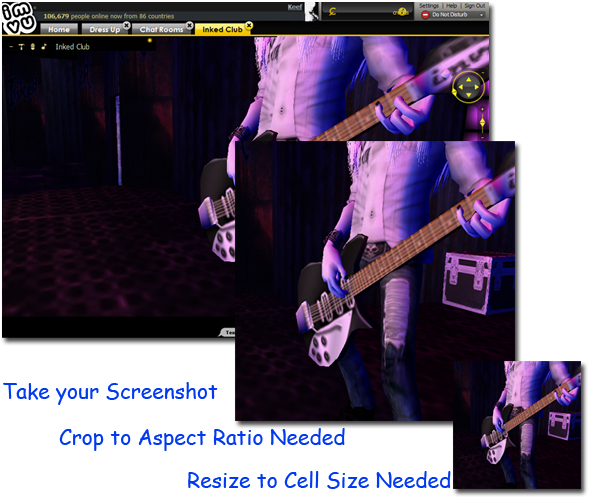
-Look at your project and see what the aspect ratio (ratio of hight to width) of the image. Is it a square? A horizontal rectangle? A vertical rectangle? Some other odd shape? In the case of the LED screen my images will need to be square so I will want to prep all my images as squares.
-Gather up the images you want to use. You will need a 2x number of them so 2, 4, 8, etc. Remember the more images you use the more they will be sized down so don’t pick too many or anything with too much fine detail.
-Crop your images to the aspect ratio that will fit your mesh. The mesh I am using has a square aspect ratio so I want my images to be square. If it were a rectangle I would crop them to be rectangular.
-I’m making an 8 image montage so I will need to resize the images to 128×128. If this stretches them oddly for your project don’t worry about it, they will stretch back out in use. (Note: if I were doing something extremely rectangular I would use a rectangular cell size)
-Make any image corrections that may be needed due to loss of detail.
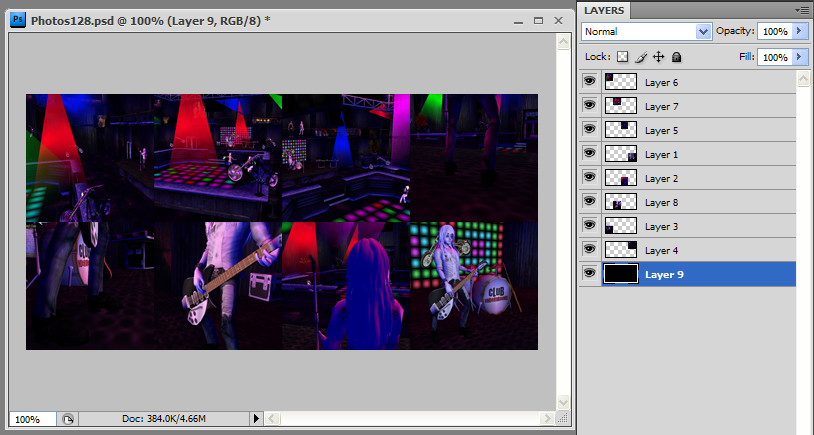
-Put all the images into the same document each on its own layer.
Tip: To make the next part easer, pre arrange the layers in the order you think you would like to see them. if you know how to make animated gifs and are using a lot of images you may want to make a gif animated first to test out the look.
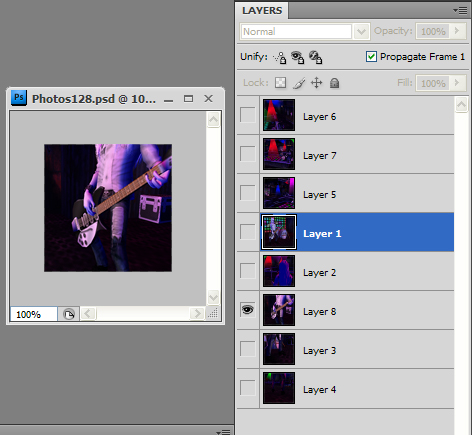
All images in one document
Creating the Celled Texture.
-Make sure the bottom most layer is not locked as background, if it is double click on the layer then click okay to make it a standard layer.

In the Layer Properties Window hit OK to unlock the background layer
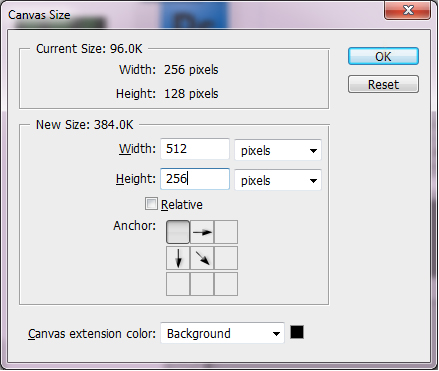
-Resize the canvas (Image/Canvas Size) to 512×265 selecting the upper left corner so that the canvas will grow to the right and below.
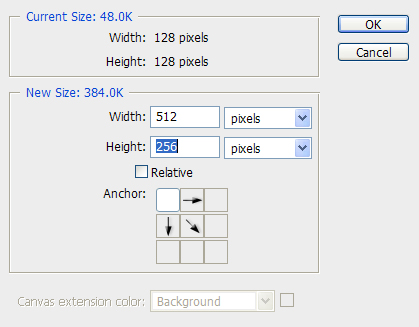
Canvas Size window
-Make sure snap is on (view/snap) so that the images snap in place when moved.
-Hide all layers but the first one and verify it is nested snugly in the upper right corner.
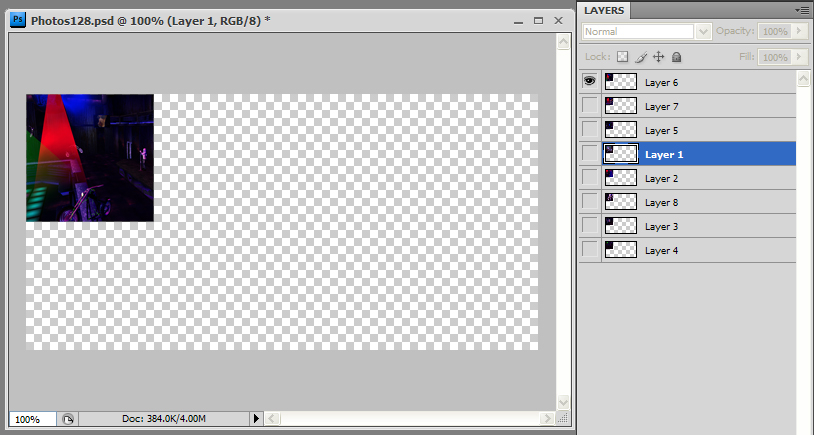
First layer in top left corner.
-Unhide the next layer and with the move tool selected move it to the right of the first image. Make sure it is snugly against its neighbor with no overlap. (every pixel matters so be exact. (You can also use the offset filter if you like (Filter/Other/Offset), and offset horizontally 128)
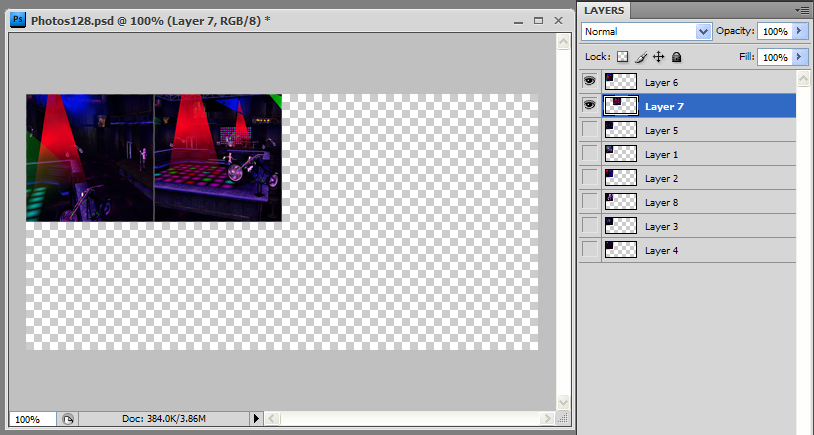
Second layer nested against first layer.
-Repeat for the next two layers so you complete the top row. If you reach the end of the row and have extra pixels go back and see where you messed up. (It won’t matter it you are 100% exact on a photo montage but it will on later textures so best to learn to get it right now.)
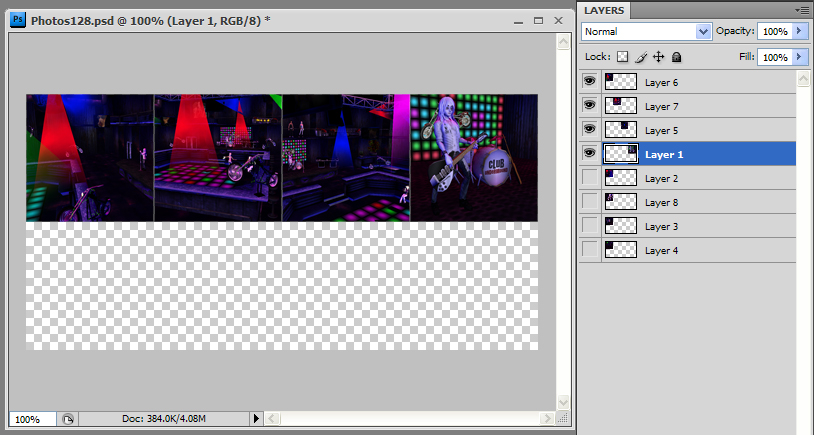
First four layers in position.
-Now that you have one row done the 5th image will drop down to start the second row.
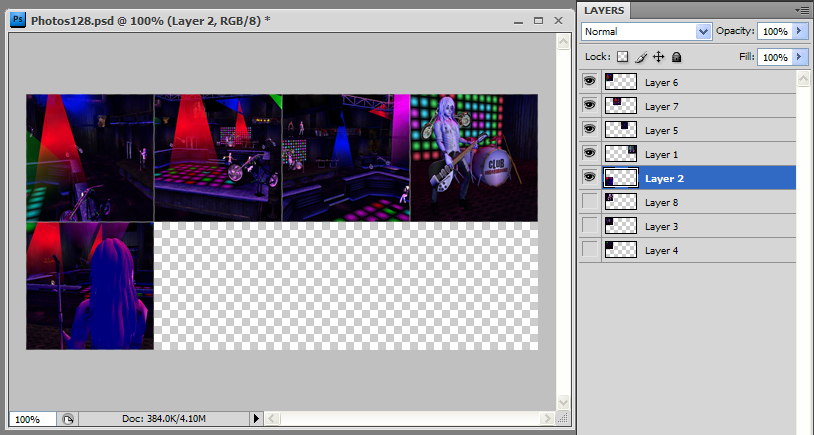
Starting the second row.
-Continue the process until all the layers are in place.
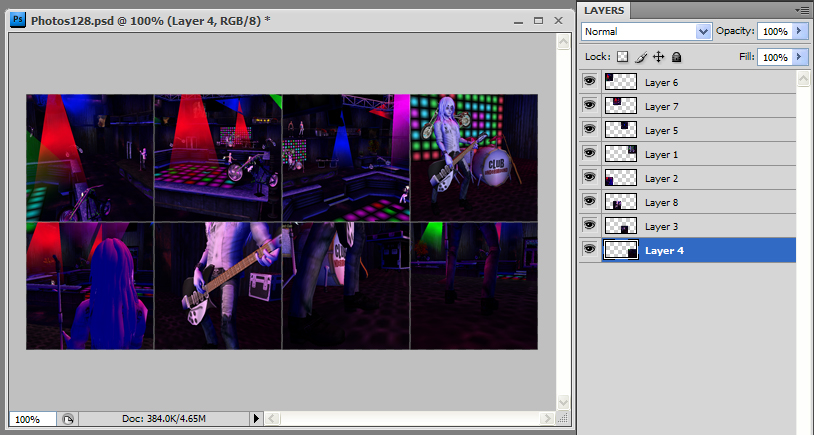
All eight layers in position.
-Now take one final time to rearrange the images if you’d like them in a different order.
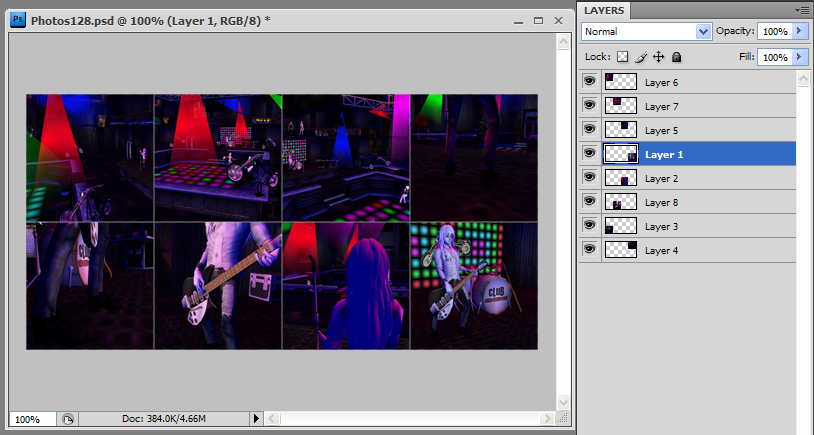
All eight layers rearranged into their final position.
-If like in this case you end up with aliased pixels (pixels that are fuzzy) on the edges create a new layer under all the images and fill it in with a neutral color for all the images (in this case black) and the lines will disappear.
Adding background layer of black to hide seams.
Tip: to prevent aliasing from happening when resizing your original graphics you can turn off softening in the resize window, though turning it off can also make the graphics look choppy. For this kind of animation being perfect is not so important.
-Save the image as a PSD for possible future editing, then save it again as a JPG.
Ta Da, your done!
Demo, Photo Montage
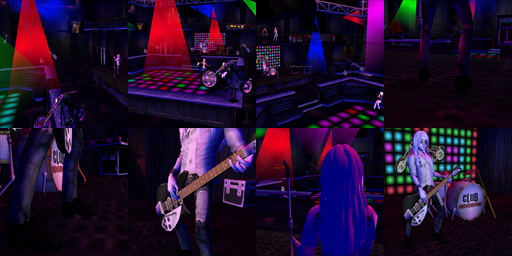
Finished 8 Cell Photo Montage
-Right click and save the above image to play with this graphic in the Previewer.
-Open the Stage LED mesh in the Previewer. PID 752501
-Apply the saved celled texture in the M01 slot.
-On the Animation Parameters clear out any current animation settings
-In the animation type dropdown chose Cycling.
-Check the ‘On’ box
-Cell Width 128, Cell Height 128
-Frames 20
-Number of cells 8
-Hit Apply changes.
-Play with the frames setting till you get to a speed you like, Big numbers slow, small numbers fast.
If you did this demo save the project, were going to add to it next.
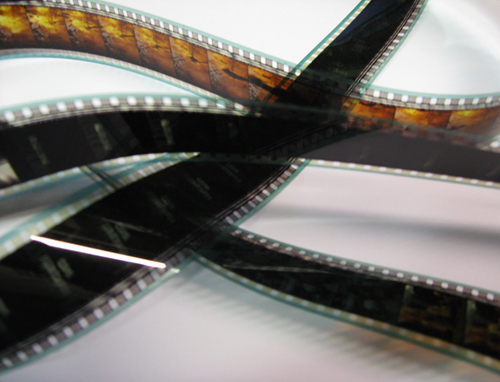
Movie Clips
Movie clips work on the same principle of the photo montage but they use a lot more frames and have a lot less detail, each cell being the next frame of the animation. To make a video clip you will need to use a Video Capture Program. I used CamStudio for this capture.
Due to the texture size limits your clip should only be a few seconds long.
Photoshop CS (32 Bit only) is capable of importing various video formats into layers (File/Import/Video Frames to layers) so if you have Photoshop CS all you need is a compatible clip from your Video Capture Program, then you can import that video clip into Photoshop for easy editing.
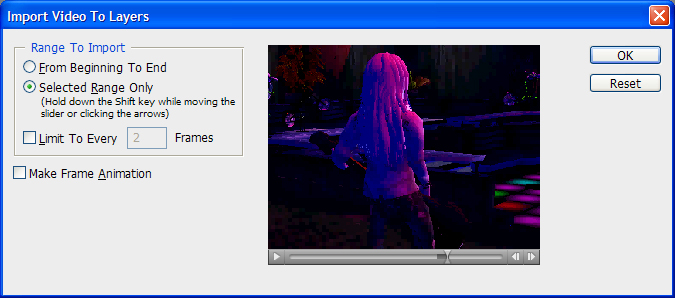
Photoshop 4 (32 Bit Only)Video Import Window.
(If you want to see it preview as a clip as your working on it go ahead and check the make Frame Animation box.)
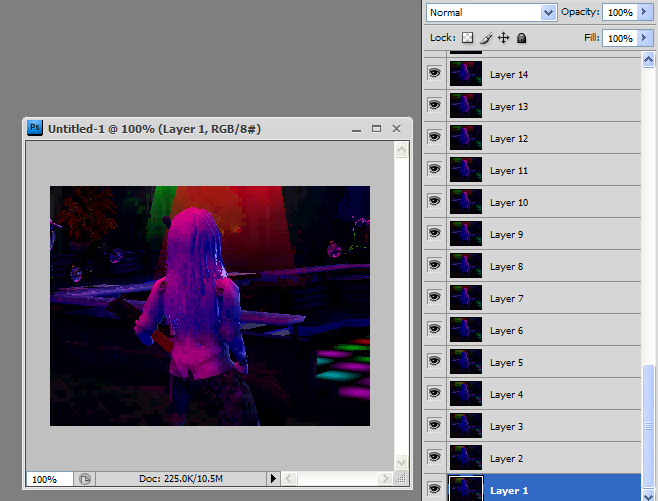
Video imported as Layers.
Apply the same principles used above in the montage tutorial to lay out the individual frames of the clip.
-Crop the image to your aspect ratio
-Resize to a small 2x standard. (I used 64×64) The smaller you can go the longer your clip can be.
-Edit your layers count down to a 2x Standard amount (I used 32)
-Expand your canvas to the size you need (I used the max of 512×256)
-Lay out your layers in a filmstrip.
-Add a background layer if needed.
-Save as a PSD and save as a JPG.
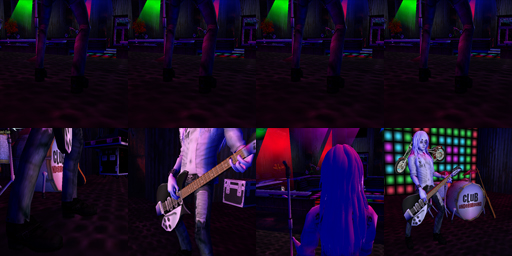
Demo, Movie Clip
32 Cell Movie Clip
-Right click and save the above image to play with this graphic in the Previewer.
-Open the Stage LED mesh in the Previewer. PID 752501
-Apply the saved celled clip texture in the M01 slot.
-On the Animation Parameters clear out any current animation settings
-In the animation type dropdown chose Cycling.
-Check the ‘On’ box
-Cell Width 64, Cell Height 64
-Frames 1 or leave balnk
-Number of cells 32
-Hit Apply changes.
If you did this demo save the project, were going to add to it next.
Cycling with Opacity
All the prior texture making applies but this time we get to do it with an opacity map too!
Each cell needs its corresponding opacity map.
Demo with Opacity
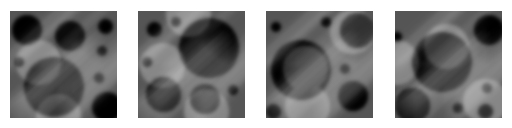
Texture (defuse map)

Matching Opacity map
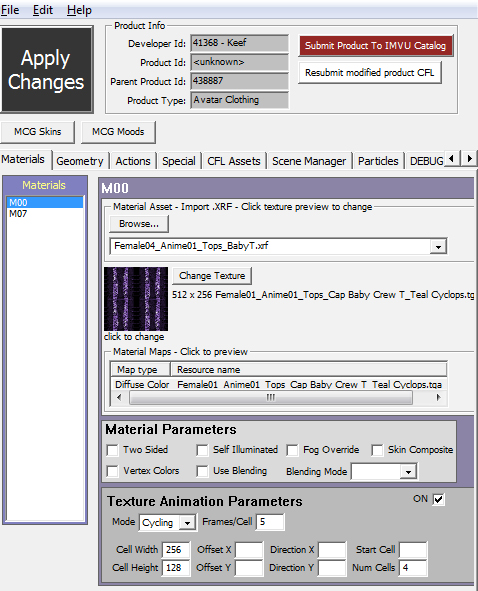
Using the Same Stage LED mesh, let’s use this as the glass and frame texture. M00
-In the animation type dropdown chose Cycling.
-Check the ‘On’ box
-Cell Width 128, Cell Height 128
-Frames 20
-Number of cells 4
-Hit Apply changes.
As you see the textures animations setting effects the opacity map in the exact same way they effect the texture. So the trick is making your opacity maps cell math your textures cells perfectly. And as always textures and their opacities must be the EXACT SAME SIZE!
For fun lets swap that image and opacity map out for one that will take advantage of blending.
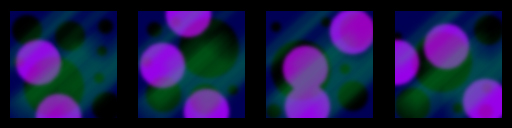
Light Effect Texture
Light Effect Opacity
Ohhhh the layering possibilities!
Opacity Notes:
Always keep in mind the rendering restrictions on blending, there can be only one layer using blending, if two blending enabled textures overlap the one behind it will poof!
Opacity doubles the texture weight of the product, so it’s doubly important when playing with opacity to use the smallest possible texture for the job.
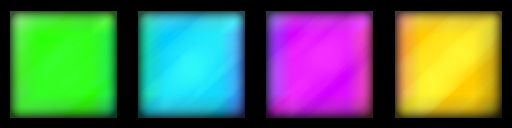
Color Changing Textures
Note: this is for continually changing items only, trigger word color changing is done by mesh animations not texture animations.
-First make sure you are not using a composite skintight mesh, if you are stop now and find a different product to play with. I will be using my corset mesh. pid 438887
-Make your garment texture as you normally would, don’t get overly fancy on the fine details as much of those details will be lost in the resizing.
-Once happy save it as a PSD and as a jpg and close your original to preserve it.
-Open the Jpg and look at its texture size, hopefully it’s already in a 2x size standard if not you’ll need to fix that first.

-My texture is 512×256 which is already at maximum size so we will have to shirk it. Shrinking it by half will give us room for four frames.
-resize it to 256×128 pixels.
-Make any adjustments to the texture needed for detail loss.
-If needed unlock the layer from the background. (this is so we can have a transparent background)
In the Layer Properties Window hit OK to unlock the background layer
-Increase the canvas size back up to 512×256 remember to make it stretch from a corner to keep your layer tight to the sides.
-Make a duplicate layer.
-With snap on drag the new till it clicks into place in a different corner.
-Repeat for the bottom two corners.
-You should now have the same image as four tiles.

-Now select each layer and use whichever tools you like to change the colors so each layer is different. (Hue, Curves, Color Balance, color overlay will all work)
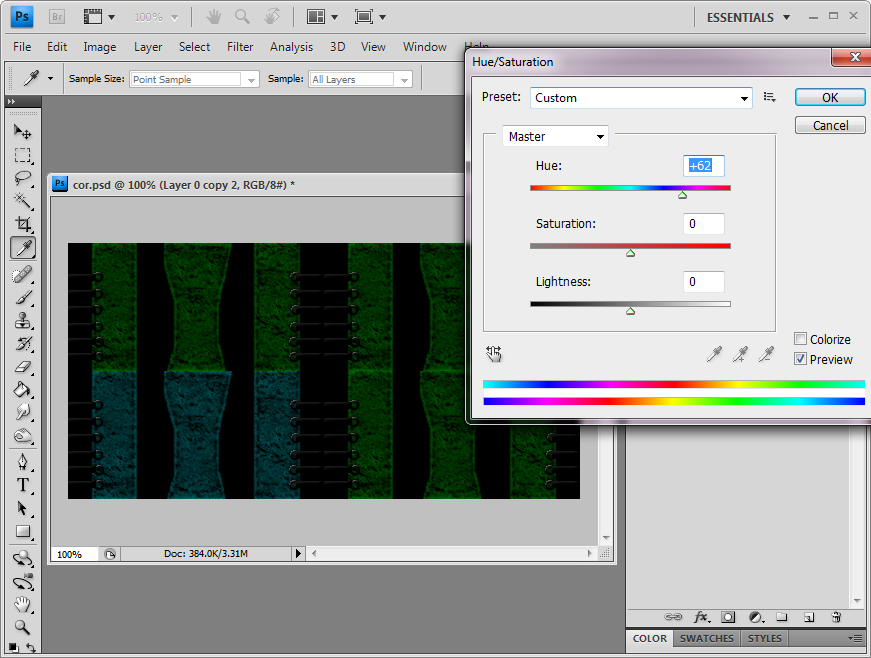
Useing Hue to tint the layers
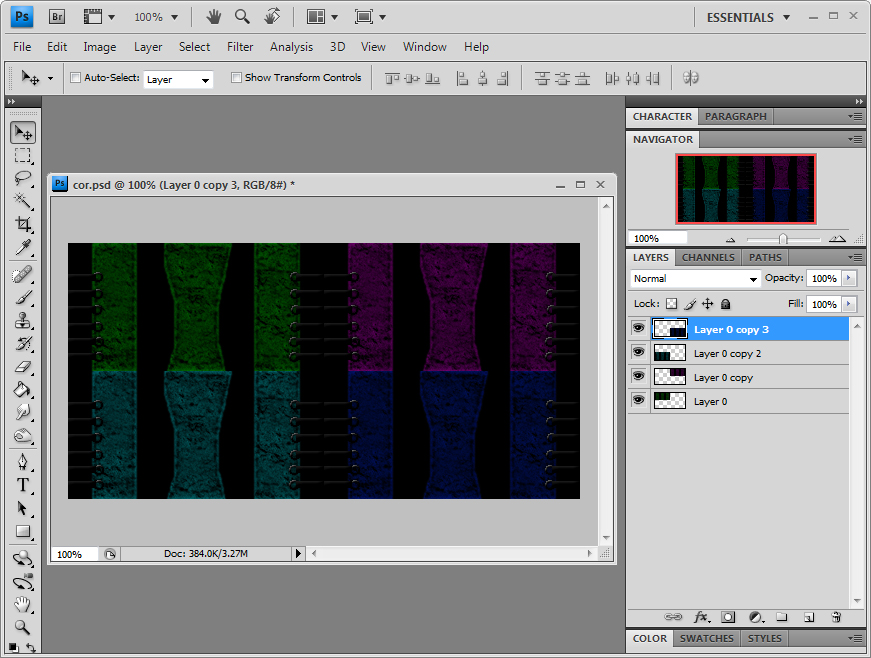
Tinted Layers
-Save the image as a psd then save it again as jpg
Color Changing Demo

4 cell color chaging corset texture
-Right click and save the above image to play with this graphic in the Previewer.
-Open the Corset Mesh pid 438887
-Apply the saved celled clip texture in the M00 slot.
-On the Animation Parameters clear out any current animation settings
-In the animation type dropdown chose Cycling.
-Check the ‘On’ box
-Cell Width 256, Cell Height 128
-Frames 8
-Number of cells 4
-Hit Apply changes.
*Tosses Confetti* You’ve now made a color changing garment texture!
Glitter and Sparkle Effects
I’ll cover two methods here, one will look like glitter without actually using animation, the other will be a true animation.
Make your garment texture as you normally would. The glitter effect looks best if the material that is going to glitter has good contrast and would realistically sparkle.
Pixel Glitter Textures
This is a simple glitter trick you can do that doesn’t require animation so lets do that first, you may like it better for some projects.
This effect looks best when a texture is oversized for its use so you will have limited success with it on garments but it works real well on jewelry and accessories.
First thing to remember is sparkles and highlights will look better if they have something to contrast with. So if your texture is close to white your sparkles are not going to read all that well.
Open your base texture and add a new layer to it. On that new layer use the pencil tool and draw one pixel white dots randomly across the surface that you want to sparkle. For this technique to work the dots have to be small and crisp.
![]()
Black corset with pixel dots layer.
Save it as a psd and as a jpg.
Glitter Cycling Clothing Demo
Here is my quickie version to show you the general look.
![]()
Pixel Glitter Corset Texture
-Right click and save the above image to play with this graphic in the Previewer.
-Open the Corset Mesh pid 438887 and apply this as the texture, no other settings are needed.
Ohhh Sparkels!
Why it works. This effect is a result of the 3D rendering engine trying to decide what pixels to render, sometimes it will chose the white dots and sometimes it won’t thus making the glitter look. The more oversized the texture is on the mesh and the more zoomed out you are the more shimmery the texture will look.
Related Texture making Tip: If your texture is shimmering and you don’t want it too, shrink it!
Cycling Glitter Textures
Now that we have the passive method of getting a glittery effect done on to actual animated effects.
-Open back up your base texture.I went ahead and added some sequin panels to mine to add something that would be sparkly.
-Repeat all the steps in the color changing tutorial up until you have the four layers all lined up.
-Make a new layer on top of the layer stack.
-Randomly add sparkles to where you want them on the texture. Make the sparkles of varying sizes and intensities. In general less is more, adding too much is not going to be very realistic.
-Play with the layer style till you get a glowy kind of glint (I used Linear Light). Don’t worry, it doesn’t have to be really bold, it will be a lot more noticeable once animating.
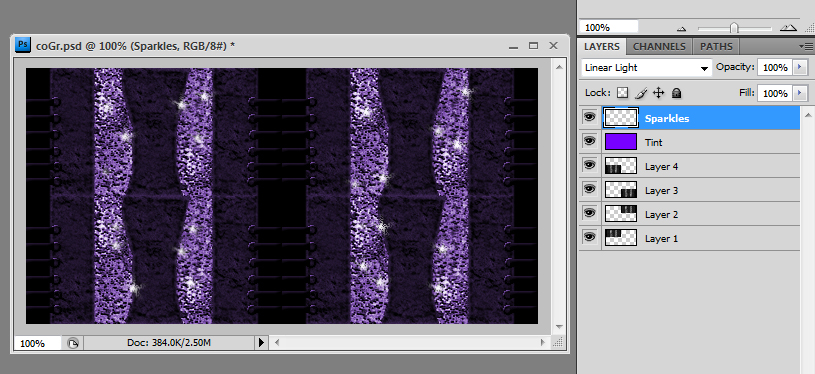
Sparkle Layer with random glints.
(If you have a sparkle looking brush you can use that if not just use a slightly bury dot. Brushes are pretty easy to make if you don’t have one Google up a tutorial on it for your program when you can.)
Save the file as psd then save it again as a jpg.
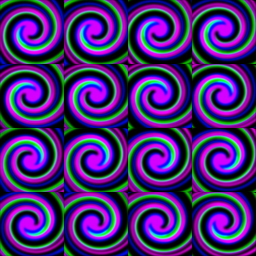
Glitter Cycling Clothing Demo

4 cell glitter corset
-Right click and save the above image to play with this graphic in the Previewer.
-Open the Corset Mesh pid 438887
-Apply the saved celled glitter texture in the M00 slot.
-On the Animation Parameters clear out any current animation settings
-In the animation type dropdown chose Cycling.
-Check the ‘On’ box
-Cell Width 256, Cell Height 128
-Frames 5
-Number of cells 4
-Hit Apply changes.
*Tosses Glittery Confetti*
The Wrap Up
Hope that helped to better explain how to make your celled textures, with a little creative thinking there is a lot that can be done with them. Have Fun!
Some More Tips for animation effect making…
If you want the image to stay on longer then the rest of the images you can do so by physically repeating that frame.
Repeating an image will make it appear to stay on longer that the rest of the images.
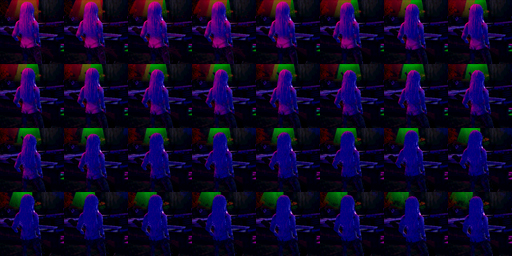
Want something to spin? Make each new cell slightly rotate until you get to a repeating point.
A Rotating Cell Texture. Height 64, Width 64, Cells 16
Not all glitter is white, a glint will bounce back all sorts of colors at you so don’t forget to play with different colors!
Dark is what makes things appear light, don’t forget your contrast!
If you are working on images with multiple layers of detail add registry marks that you will later delete to the corners of the layers so you can get all the layers to line up correctly.
Be accurate in your math and your pixels, being just one pixel off will ruin the illusion of an animation.
Happy Deving!
![]()